'It is better to light a candle than curse the darkness' Proverb
Showing posts with label Wedding outfit. Show all posts

Sunday, 27 March 2022

Wedding Outfit: the Outerskirt

So, this was the last sewing part of my wedding outfit to do.  I knew this one was going to be a bit of a head scratcher, but I had a very specific image I wanted to at least attempt to achieve. Originally I wanted to get secondhand curtains or table cloth, but after a lot of searching I couldn't find what I was looking for so I ended up buying from a local shop which stocks end of line products.  

As I wanted the scallops which run along the bottom of the curtains to run along the bottom as the skirt I needed to be accurate with the length.  This would also mean that, rather than just cutting the pieces out, I would need to put darts along the top of the pieces to get that shape.  I used the pattern pieces from the fantail skirt to help me get the same shape. 

First, I measured the length of the skirt (adding on the seam allowance) and transferred this onto the pattern pieces.  Then I pinned the scallop edge along the measured edge, pinned up along the sides, and then placed in darts at the top before cutting out the fabric.  I sewed up the darts to hold them into place, though these didn't hold particularly well due to the fabric.  

I sewed up the side seams, using a run and fell seam to give it some extra strength, and then used the same waistband pattern for the skirt I cut out a waistband piece.  Once I'd sewed the band on I realized that the darts on the front panel were going the wrong way, so I had to unpick this section and resew it with the darts the right way this time.  I hemmed the seam, with it running down into the skirt as I wanted to waistband to remain more clean looking.  The way these curtains are made the fabric doesn't actually need hemming as it doesn't fray.  However, as all the seams are visible from the outside I wanted them to be neat.  

Before I started making this I had thought that I'd leave the two skirts separate, but once it was on I realised that the two could easily separated whilst we are doing all our activities on the day..  So I sewed the two waistbands together with a top stitch.  Unfortunately, since doing this I noticed that the scallops at the front of the skirt are no longer flush with the bottom of the skirt.  I think it's due to the seam around the waist band which has could have lifted the fabric, so I'm going to iron it and hopefully that'll flatten this down.

And that's it, the last item I needed to sew for the big day.  The only thing left to make for the outfit was a shawl, which I've now knitted so it is complete.  Now all I need to do is work out hair and makeup, should be interesting.

Sunday, 13 March 2022

Wedding Outfit: the Top


There was a very particular style that I was wanting for my wedding top and it has been so stuck in my head that I didn't want to produce anything else.  There was a lot of searching online for the right pattern, but, even though the style is quite simple, I just couldn't find one that looked quite right.  I did, however, find a blog that described how to make something similar to what I was looking for (
Off-the-shoulder Ruffle Top by We All Sew) and decided I would use this as the starting point for the design I wanted.


This top was to be an off the shoulder top and part of the look that I was going for was to have lace along the top and around the shoulders.  However, I couldn't quite work out how I was going to make that work on a top that needed wasn't going to have any fastenings and which would hopefully be able to take some movement.  Then I realised that there is actually elastic lace out there, so I headed over to Minerva (which is fastly becoming my go to shop for everything sewing related).  When it arrived in the post it was actually much more beautiful than I thought it was going to be and it has the stretch it needs whilst still sitting really nicely along my skin.  The rest of the top was made up using the cotton bed sheets I had used to make the skirt with, but which I had put aside before dying.


My plan was to just draw the pattern straight onto the fabric and then cut it out from there, but I got a bit nervous about that so I decided to draw it out on paper first.  As I don't have any pattern paper but do have a lot of paperwork from when I did a mini declutter a little while ago I decided to just Sellotape those together and use that instead.  I double checked all of my measurements and then transferred this information onto the paper adding a 1.5cm seam allowance.  And yes, that is a bowl you see that I used to help me draw the circular sections underneath the arms.


The information on the website I edited this pattern from tells you to put out the front and back pieces exactly the same.  However, I have a small back and relatively large chest, so this would mean that the top wouldn't actually sit properly on my and would end up showing off my bra at the front of the arm holes.  To counter act this I increase the width of the front piece and reduced the width of the back piece, so I now have two pattern pieces which make up the main body of the top.


I started by sewing up the side seams of the body to check the fit and, once I was satisfied with this, did a run and fell seam along these sides and tidied up the edges of the arms.  It was then time to work out what size I wanted the lace section to be and where exactly on my shoulders I wanted it to sit.  I originally sewed up the lace based on measurements I took of my shoulders, but it was too lose so I tightened it a little.  


Next up was attaching the main body to the lace trim and, I'm not going to lie, this did take quite a while.  Firstly, the lace needed to sit a lot further down the top than I originally thought it would need to.  Even when I got this right and had sewn it all together it still didn't sit right and I had to unpick it and try and fit more of the cotton fabric into the lace.  As you have to stretch the lace to work the non-stretching cotton in I was worried that having to do this repeatedly would over- stretch elastic in the lace so that it no longer functioned properly.  Thankfully though, this wasn't the case and the top now fits exactly how I wanted it to.  


The last thing was to check the length of the top and then hem it with the basic fold over twice and sew method.


Now that it's all finished I am very happy with the results.  I am a little worried that I've now made the lace a little bit too tight, but we'll see how it goes.  I'll try it on again a little closer to the time and make any changes I need to then.  It feels good to have ticked off something else on the list of things I need to craft for the wedding.  Whilst I was making this top I was also making the matching masks we wanted to have just in case things changed with the pandemic again.  So now what's left it the lace overskirt, my partner's tie, and knitting my shawl.  I'm getting here, which is great and is making me feel a whole lot less stressed than I was before.

Sunday, 27 February 2022

Wedding Outfit: the Petticoat

I'm not sure you would actually call this a petticoat, more of an underskirt to help give the actual skirt the volume I wanted.  I did think of making a proper petticoat, but I wasn't sure if I would actually have the time.  Maybe some other time.  For this quick project I decided to use tulle as it's a very light weight fabric and an easy way to make volume.  I got 4m of it and actually ended up with much more than I had intended as it was actually folded up more times in the shop than I realised.  I didn't use a pattern for this, but just put it together based on the shape I wanted.  

The plan was to make two layers that was made up of two tiers of the tulle, with each tier being about 55cm wide.  The length of each tier was based on my hip measurements, with the top tier being twice my hip circumference and the bottom tier being four times my hip circumference.  Both of these were gathered to give the volume I wanted.  Construction was pretty simple.

First I put in a long stitch along one of the longer edges of the bottom tiers and pulled on the thread to gather it until it became the same length of the top tier.  I then sewed the two tiers together.

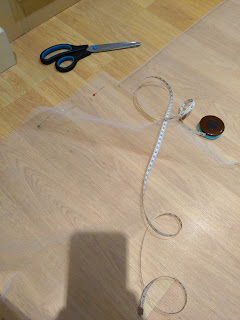
I then put a long stitch along the top tier and gathered that in until it fitted the size of my waist.  I had originally planned to then sew this into its own waist band, but I realised that this would just add an extra layer to my waist and would be something else I would need to manhandle on the day.

When I first attached it to the waist band of the skirt and tried it on I realised that it was far too bulky around the waist.  So I detached it from the skirt and undid the gathers.  I then put in darts instead to draw in the waist width and reattached it to the skirt's waistband.  This worked much better and still produced the extra volume I was wanting.

I then sewed up the sides of the two layers, stopping just below the opening of the skirt.  The last step was to ensure that the hem of the petticoat was just above the hem of the skirt.  I hung up the skirt inside out so that the petticoat was on the outside to my dressmaker's mannequin and left it for a little bit of time to allow any stretching to happen.  Then I cut the hem by the needed amount.

This petticoat actually turned out a lot better than I was expecting and, even though you won't actually see it on the day, I'm a little proud of it.  It has made my skirt sit exactly how I want it without adding any unnecessary bulk or weight and I might actually leave it on the skirt after the wedding.  I have to admit that this type of 'winging it' sewing of probably my favourite way to sew as it's easier to fit the garment to my shape.  So that's one more wedding crafting done and that now leaves the top and outer skirt to sew, and my shawl to knit.